Hitachi VSP G130 Installing Instructions
After concluding the self-installation successfully, perform the following post-installation activities.
Step 1: Unpack the storage system
Before you begin
Make sure your data center meets all
you are not using a Hitachi Universal V2 rack, make sure the electrical specifications of your rack meet the power
requirements of the storage system.
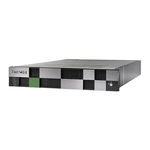
1. Inspect all materials for signs of damage. If you see damage, discontinue the installation and contact your Hitachi
site preparation
requirements before you install the storage system. In addition, if
Updated: Mon, 01 Feb 2021 07:07:26 GMT
Powered by
Table of Contents
Related Manuals for Hitachi VSP G130
Virtual storage platform (28 pages)
Virtual storage platform (32 pages)
Virtual storage platform ,sim reference (30 pages)
Cim/wbem (288 pages)
Virtual storage platform gx00 and fx00 (414 pages)
Virtual storage platform (106 pages)
(without svp) (35 pages)
Virtual storage platform (36 pages)
Virtual storage platform (51 pages)
Summary of Contents for Hitachi VSP G130
- Page 1 Step 8: Register your storage system with Hitachi Vantara support If you have not already registered for access to Hitachi Support Connect, do so now. Otherwise, you will not be able to download and install Hi-Track Remote Monitoring system, and you will encounter delays in getting your storage system running and supported.
- Page 2 Installing your VSP G130 storage system Step 2: Install the storage system into a rack Mount the controller into the Hitachi Universal V2 rack or into a 4-post EIA 310-D compliant 19-inch rack with square mounting holes and rear-facing power distribution units (PDUs).
- Page 3 The following instructions describe how to install the controller into a Hitachi Universal V2 rack. For information about installing the controller in a third-party rack, see the documentation for that rack. WARNINGDue to the heavy weight of the controller, use a mechanical lift or at least three people to lift and mount the controller in the rack.
- Page 4 2. Facing the front of the rack, find an empty 2U location where you will install the controller. 3. Place the left mounting rail as shown in the following figure, and then use two flathead screws to secure the rails to the front vertical post on the rack.
- Page 5 4. Slide the length of the left mounting rail to fit the length of the rack. 5. Use two flathead screws to secure the rails to the rear vertical post on the rack. https://knowledge.hitachivantara.com/Documents/Storage/VSP_G130_GF350_GF370_GF700_GF900/88-03-0x/Installation/0… Updated: Mon, 01 Feb 2021 07:07:26 GMT Powered by.
- Page 6 6. Tighten the four screws on the left mounting rail. 7. Repeat steps 1 through 6 to attach and secure the right mounting rail to the right side of the rack. 8. Position the controller so the front faces the front of the rack, and then slide the controller gently onto the rails. Stop sliding when the mounting flanges on the front of the controller touch the vertical face of the rack.
- Page 7 The rack installation for your controller should resemble the following figure. Item Description Washers, O-rings, and screws securing the controller to the front of the rack Parent Topic • Installing your VSP G130 storage system https://knowledge.hitachivantara.com/Documents/Storage/VSP_G130_GF350_GF370_GF700_GF900/88-03-0x/Installation/0… Updated: Mon, 01 Feb 2021 07:07:26 GMT Powered by.
- Page 8 Step 3: Connect the storage system to power The storage system's input voltage is auto-adjusting for 100-120 (+6%) / 200-240 (-11%) VAC, 50-60 Hz power connections. Power is provided through two power supplies, one per controller. For best practice, establish power redundancy by routing each power supply to independent PDUs and then routing the PDUs to separate external power sources on different branch circuits.
- Page 9 PDUs on the left and right sides of the rack Parent Topic • Installing your VSP G130 storage system Step 4: Cable a management console A customer-supplied computer is used to set up and manage your storage system. Before you begin •.
